Lego-Sequencer
A more detailed description of the Lego sequencer that I build for a general assembly we had with the whole institute. The idea is to bring the concept of DNA sequencing in a joyful way to people, who are not familiar with the concept.
Especially for kids that system should work, I will test it in the next days also during a “Bring your kids to work”-event.
First of all, a short video on how the sequencer operates
Overview
The principle idea of this sequencer is that users can build a genome with 2×2 Lego bricks. This sequencer here accepts genomes of length 8. However, other combinations are of course possible. Each Lego brick is now associated with a certain gene (e.g. OMO1) and each colour is again associated with a certain “DNA-base” like A, C, G or T. That means, depending on how the user puzzles the eight lego bricks together, we get a theoretical sequence of eight bases (e.g. AGCTGACG).
Now, we have also a phenotype table. That means, we know for each gene how it affects the “thing” we sequence. Here, we sequence Monsters! For example, the first gene determines how many eyes our monster has – A indices one eye, C could be two eyes, G are four eyes and T even eight eyes!
Once the genome is constructed, it can be placed in the sequencer. Upon start of the software, the sledge pulls in the genome and reads the colours of the genome and reports it back to the software for base calling. Our software then provides the user with the correct (hopefully) sequence of bases and prints out a data sheet.
Here, the user can decide between the “AI” and “Expert” mode. In the “Expert” mode, the user needs to draw the discovered monster him or herself. For that, we provide the genotype/phenotype table and a proper sentence that describes the discovered monster, based on the sequenced genome. Then, it is up to the Expert to derive the appearance of the monster.
However, in modern age, discoveries are also supported by Artificial Intelligence (AI). If the users decides for this approach, an AI algorithm takes over and analyses the sequenced genome and provides the user with 9 possible, predicted appearances of the sequenced monster.
After that, the user/investigator can name the monster still.

Requirements
- Arduino Uno R3 (https://docs.arduino.cc/hardware/uno-rev3)
- A stepping motor plus controller
- An RGB sensor (e.g. Adafruit TCS34725)
- 2×2 Lego bricks in four colours (preferrably red, green, blue and yellow)
- Something to build the sequencer, I used also Lego for that, but wood, acryl, etc should do as well
- Installed craiyon API (https://github.com/FireHead90544/craiyon.py)
- Installed Arduino IDE (https://www.arduino.cc/en/software)
- Installed R and RStudio and all required libraries (if you do not have them, install them as you reveive the error messages 😉 )
Instead of using an Arduino and a dedicated stepping motor, I used in this project actually an Elegoo starter kit that contains a compatible microcontroller, stepper and stepper controller. You can find it here https://www.elegoo.com/products/elegoo-uno-most-complete-starter-kit But I suppose, any sort of stepper motor should do.
Wiring and construction
My final version of the Lego sequencer looks like this (I have to admit, this is truly ‘EVO1’ and could be improved a lot. However, in the interest of time I was happy with this first draft version of it
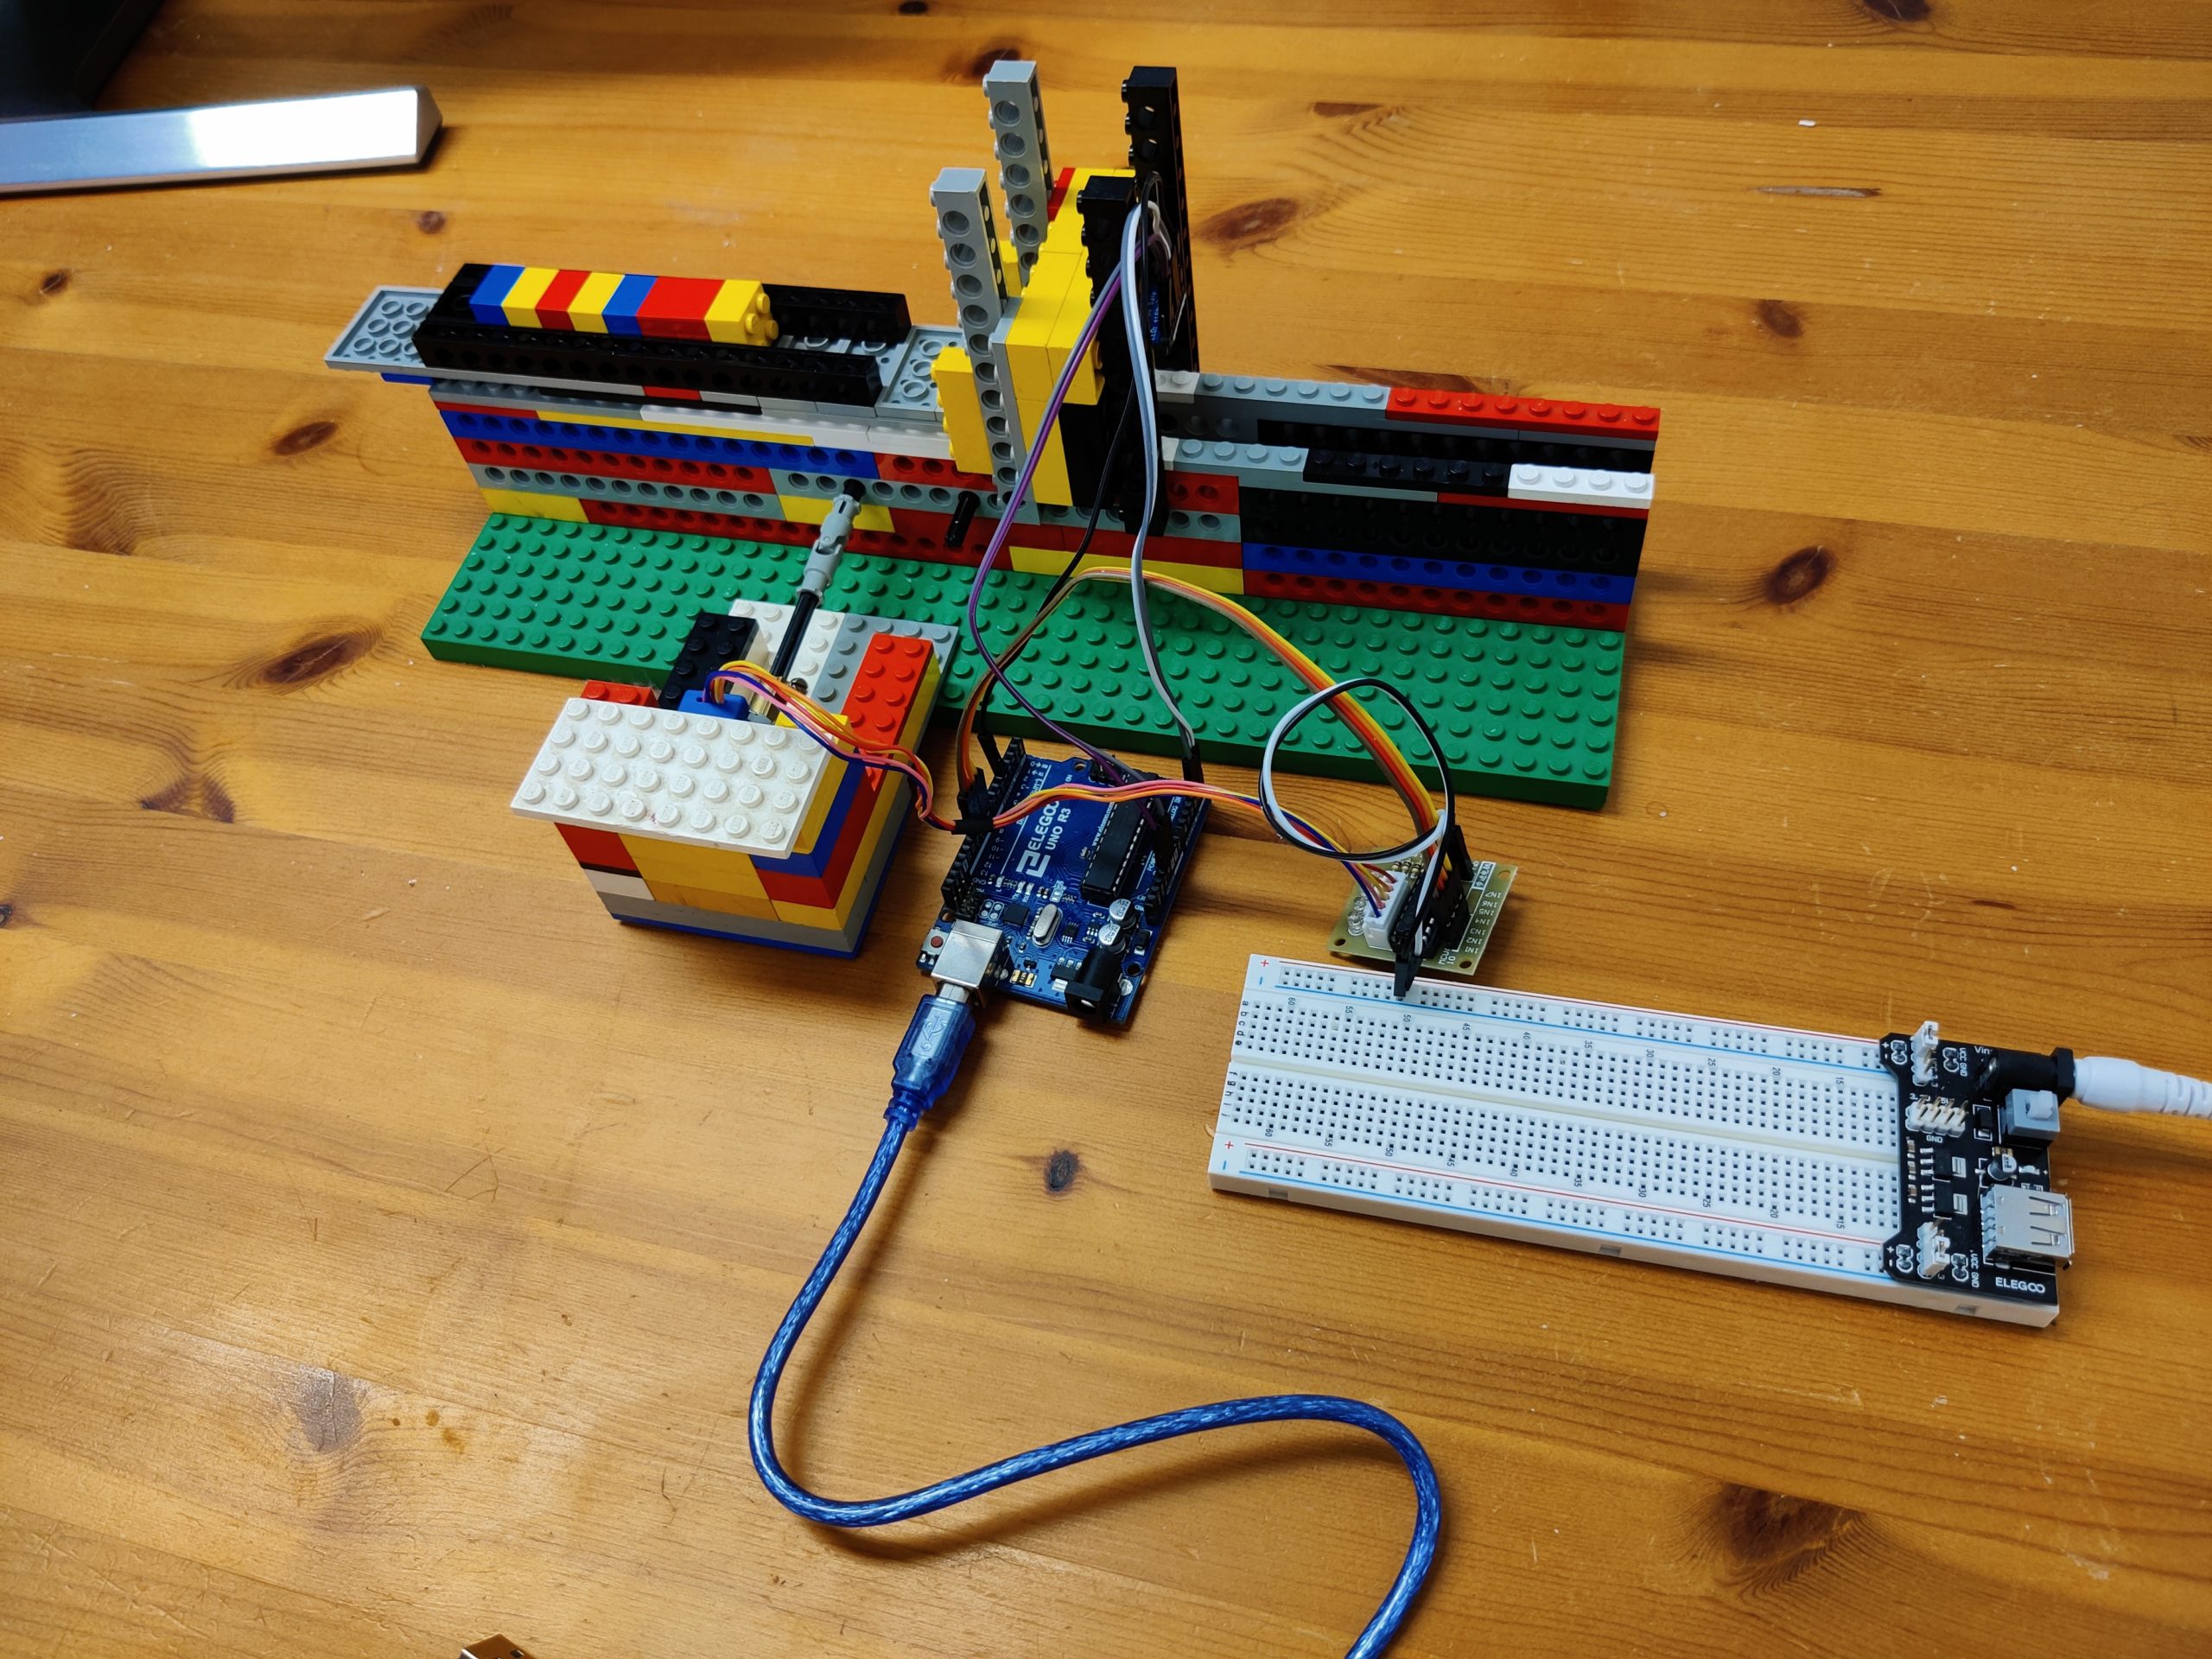
Here you can see the chassis for the stepper moter (covered with the flat white plate), the microcontroller (blue), the stepper controller (green) as well as the sequencer itself. The breadboard I used for testing purposes (e.g. I made the sequencer operateable via remote control, but dropped that feature again) and somehow it remained in the current setup. Currently it is only used to connect the power supply with the stepper motor.
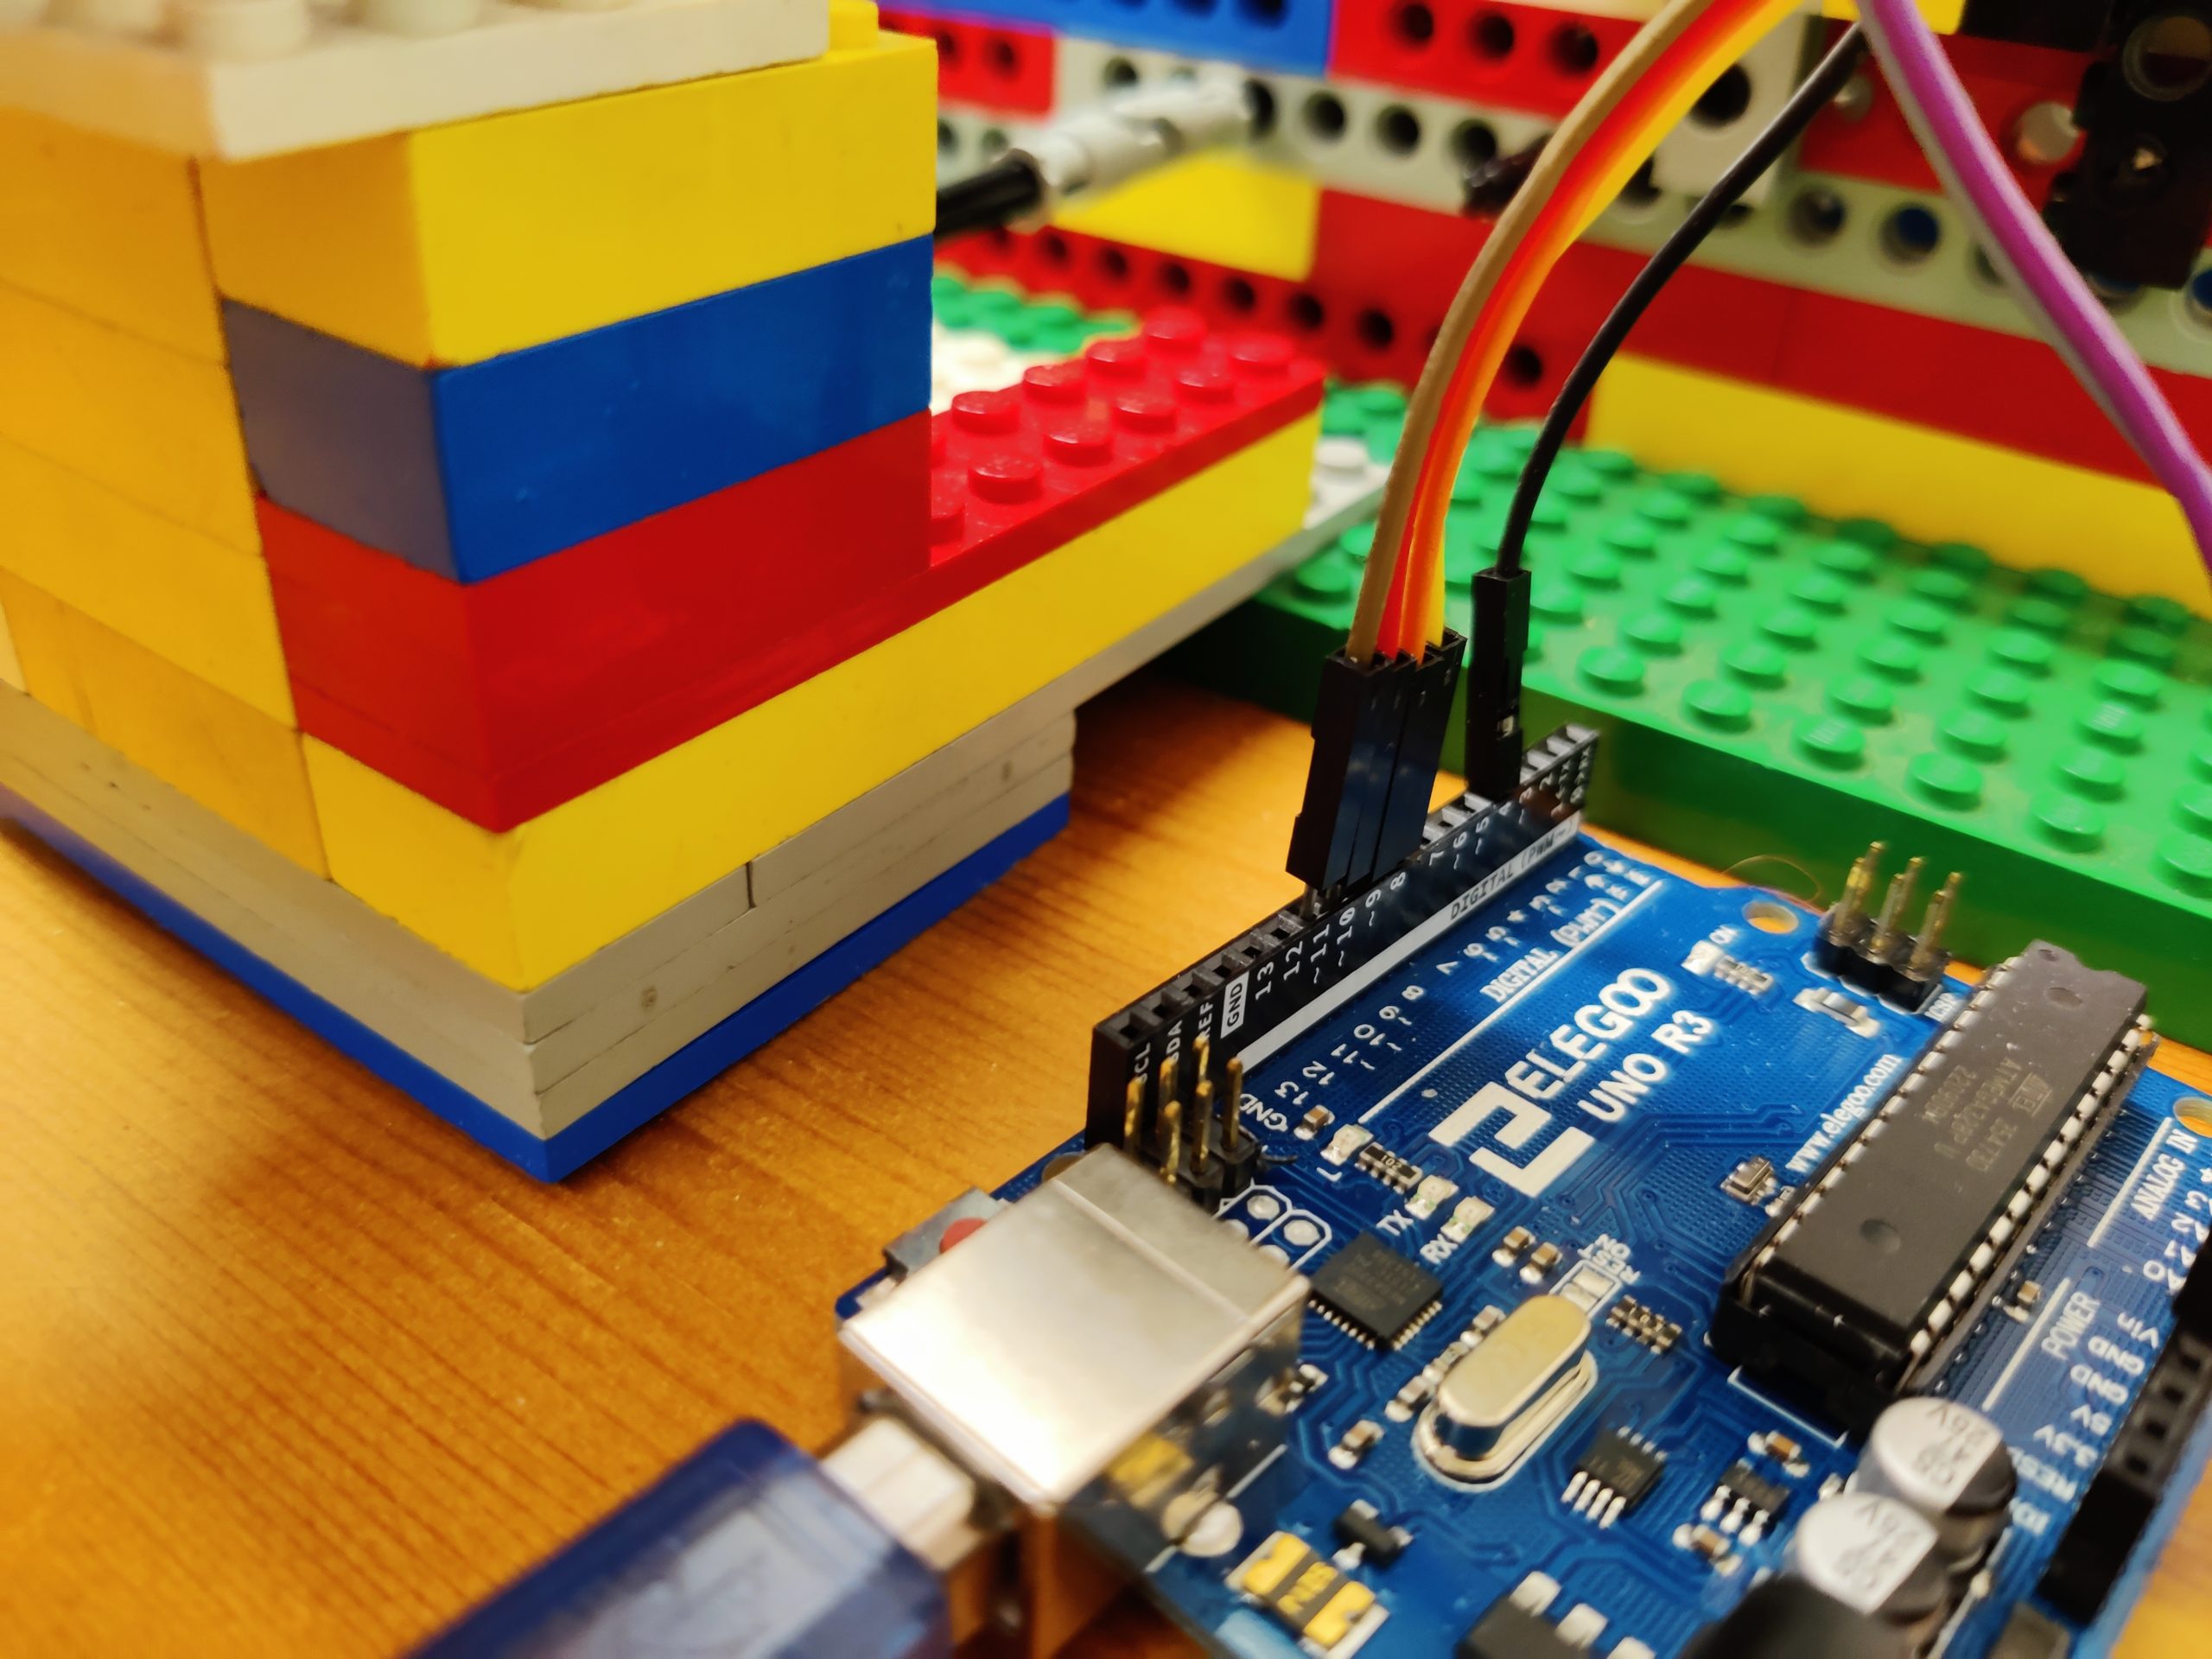
The stepper motor is then connected to the ports 8 to 11 from the digital panel. Further, the RGB colour sensor is also connected to the digital port 4.
On the analog port, we have the following wiring

The wires from the analog panel all go to the RGB colour sensor.
The stepper motor itself I only clamped into the construction. The main reason for that is that I didn’t trust that it is powerful enough to drive the sledge, but apparently it is and now the provisorial remained. However, in a later stage this is certainly something that would need to be improved and also maybe a larger engine could be used here.

To connect the stepper motor with the Leo technik pole, I opened a larger screw terminal and took out the inner copper part and screwed it on one side to the engine and on the other to the lego. As I did not trust so much in the power of the engine, I added still a transition to it to reduce the forces a little.
As a ‘funny’ side-story, the Lego bricks that I use here are all bought “a long time” ago and I used to play with them as a child, then stored them in the attic for quite some time before they are now reused here in this project.
Software
On the software side the whole project is also not too complicated. I created a GitHub repository that contains all required software here: fischuu/Lego-Sequencer: Lego-Sequencer project (github.com)
First, I recommend the Arduino IDE to transfer the microcontroller code to the arduino. Here you probably need to adjust the settings for your stepper motor, like how many turns to get the sledge in, how many to get one brick forward and how many backwards to move the sledge out again.
Another tweak will be to adjust the settings for the RGB sensor. Here it highly depends on how long you keep it scanning your bricks (as longer as more intense the colour readings will be…). That probably needs some forth and back.

The next step is to open the R / Rstudio (if you use it…) and try to setup the connection. The most important thing is here that you use the correct COM port (remember to close the connection from the Arduino IDE, otherwise R cannot communicate with the Arduino).

If you want to use the AI mode, you further need to install the Cariyon API that you can find here: FireHead90544/craiyon.py: Unofficial API Wrapper for craiyon.com (DAL-E-MINI). Generate awesome images from text tokens. (github.com)
(Please keep in mind, that while writing this tutorial the API was buggy and add a png file extension to the files, although they are jpeg s. Hence, I needed to take some extra turn in the R Script. An updated API I have created here: fischuu/craiyon.py: Unofficial API Wrapper for craiyon.com (DAL-E-MINI). Generate awesome images from text tokens. (github.com)
Currently, I write still a wrapper script to make the handling easier (and possibly send out the pdf-report as email). Also, I would like to store the sequencing runs to do later still ‘population analytics’. Once I have it finalised, I will add it here.
Disclaimer and Credits
This project was heavily inpired from SAMTOMINDUSTRYS/monsterlab: Monster Lab: teaching the science of sequencing with Lego (github.com) .
Questions
In case you want to rebuild this sequencer and run into troubles, please do not hesitate to reach out. Also, if you reuse the setup during some event it would be nice to receive a short shout-out, e.g. via twitter (@fischuu).